
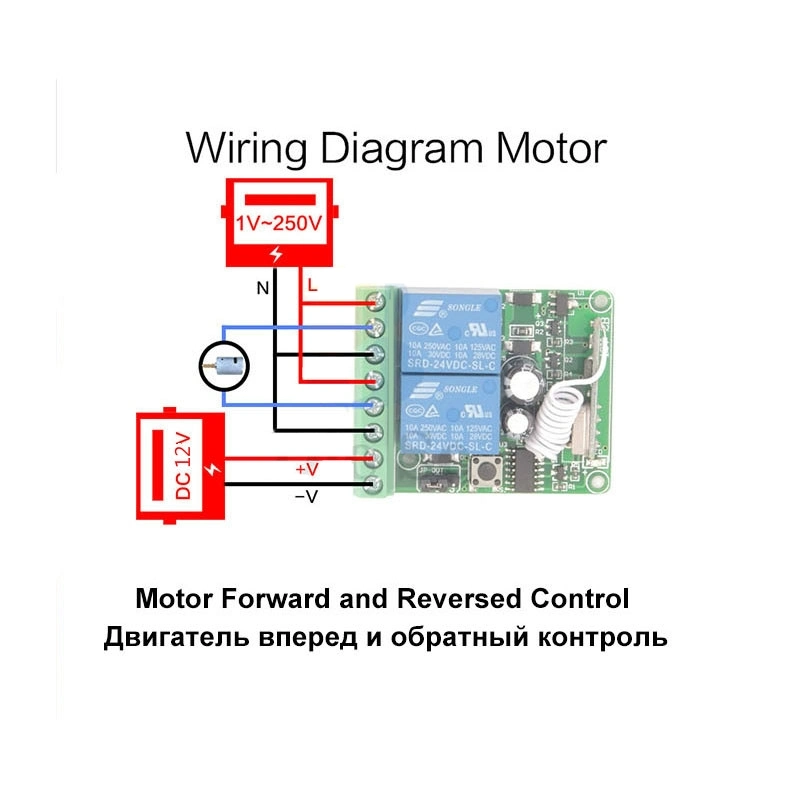
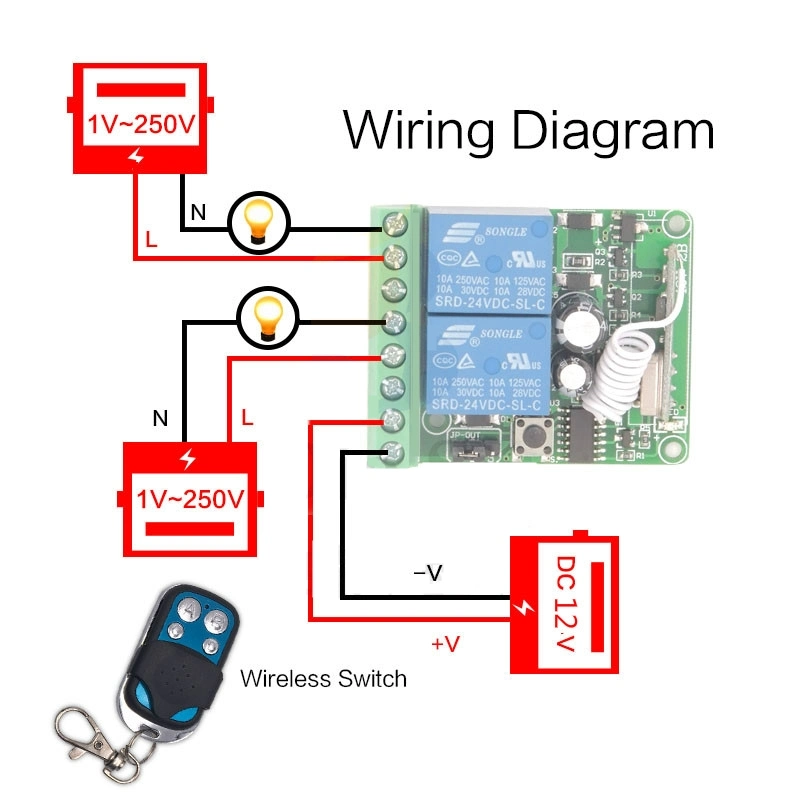
433 MHz Wireless Remote Control DC 12V 10A 2CH rf Relay Receiver and Transmitter for remote switch Door/garage/motor control
Product Detail
- Working Voltage : DC12V
- Output vlotage : 1~250V
- Quiescent Current : <5MA
- Max current : 10A
- RF frequency : 433MHz
- Working temperature : -30~+80
- Receiving Sensitivity : >97dbm
- Amount of storage remote controls : 25 pieces
- Support encoding : 1527 Leaning code/2262 fixed code
- RF Operating mode : ASK superheterodyne wireless reception
- Receiving range : Open space is more than 50 meters
- Remote operating mode : Momentary Mode /Toggle Mode /Latched Mode
Package include
Receiver module
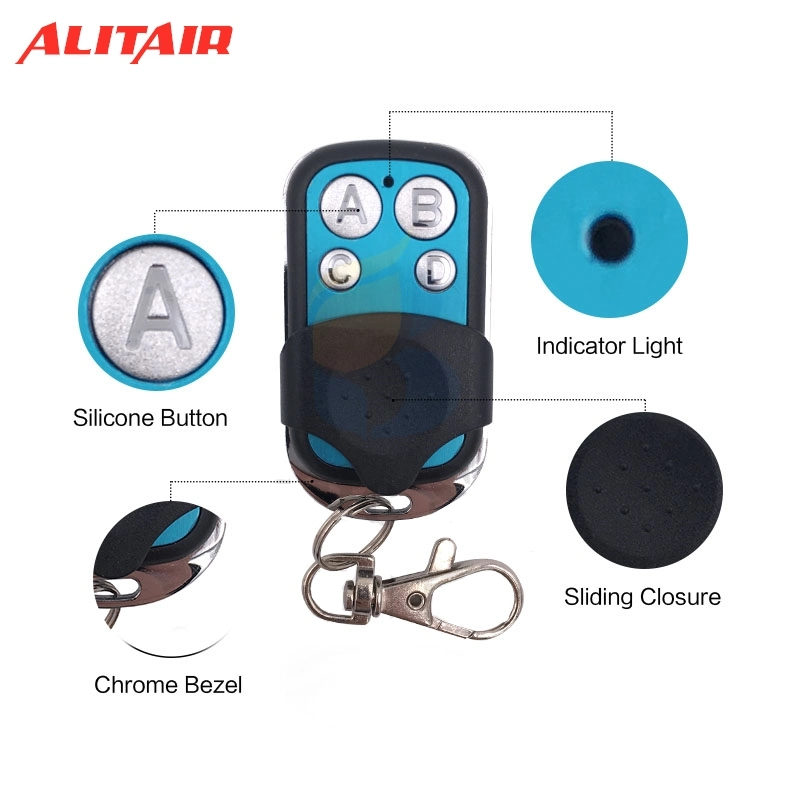
Remote Control (include battery )
Product Manual
Operating Mode
You can match the Transmitter with the Relay Receiver Module in 3 modes.
Momentary Mode:
1. Press and hold one button, relay will turn on;
2. Release the button, this relay will turn off.
Toggle Mode:
1. Press button "A", relay "1" will turn on positive direction current;
2. Press button "A" again, this relay "1" will turn off.
Latched mode:
1. Press button "A", relay "1" will turn on positive direction current;
2. Press button "B", relay "2" will turn on negative direction current.
Set Up
- Part 1: Delete the existing data about remote mode
Note:When you receive our products, it maybe set in one remote mode randomly, that because each product got test when it can be arranged to shipment.So, please delete the existing data about remote mode for the first application.
Press and hold the learning button (on the Receiver) 5 seconds. The existing data will be deleted succeed.
After deleted the data, all the remote control cannot work any more.
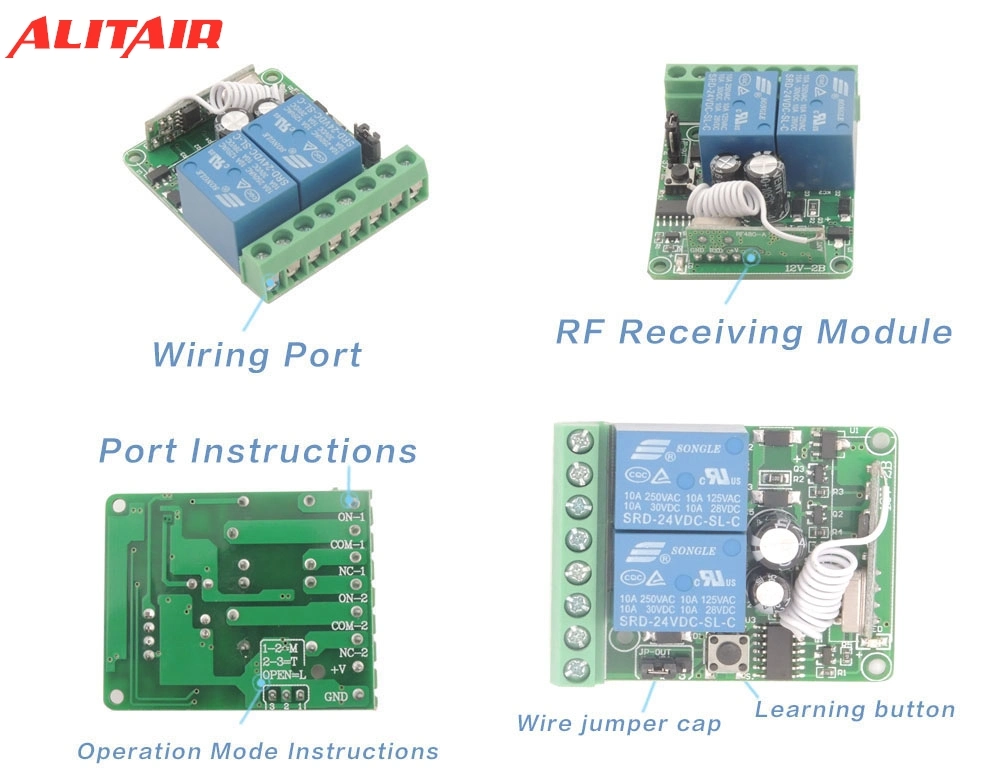
- Part 2: Select the operation mode
Momentary : Use wire jumper cap to short port "1" and port "2" interfaces.
Toggle : Use wire jumper cap to short port "2" and port "3" interfaces.
Latched : Interfaces port "1" and port "2" and port "3" are not connected
Part 3: Match the receiver and remote control
1. Press the learning button(on the Receiver) once, the indicator lights up;
2. Press button "A" on the remote control. Wait for 3 seconds.
3. Press button "B" on the remote control. Wait for 3 seconds. Succeed.
Note:
Delete the existing data before you want to change the operating mode of one remote control.